Preparing Adobe Photoshop Files For Printing

Step 1: Create a New Document
- Launch the Adobe Photoshop application.
- Choose File > New.
- Set the Width & Height of your file, plus 1/8" (0.125) on each side if your design includes bleeds (example: 2.0" x 3.5" Business Card with full bleeds = 2.25" x 3.75").
- Set the Resolution to 300.
- Set the Color Mode to CMYK Color (8 bit).
- All other settings will depend on your finished design, including the orientation and background contents.
- Because Photoshop is unable to create pdfs with bleeds and trim marks, remember to build into your file.
- Click Create.
Step 2: Saving Your File
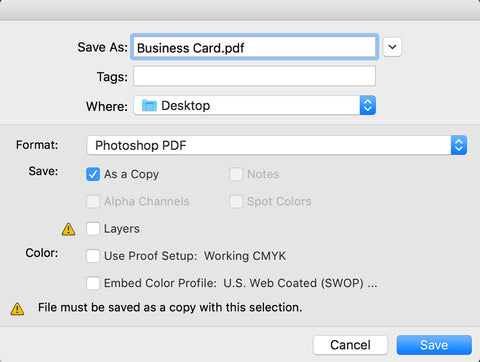
- When you have completed your design and have deleted any design guidelines/templates, choose File > Save As.
- Enter a file name for your design.
- Select the Format: Photoshop PDF
- Uncheck the Layers checkbox so that your exported artwork is flattened. Flattening your artwork ensures the appearance of your layers is preserved.
- Uncheck the Embed Color Profile checkbox.
- Click Save to show the Adobe PDF window.
Step 3: Saving Your File as a Print-Ready PDF
- PrintSource360 processes all print files through a PDF workflow, which is proven the most reliable format for processing design files for high-quality print production.
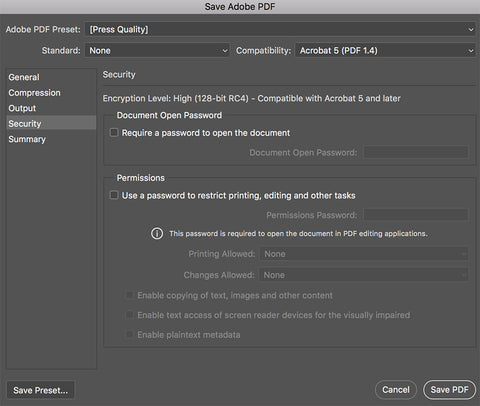
- In the Save Adobe PDF window, select our preferred settings for saving a print-ready PDF file. To ensure the finest printing quality, please match the settings exactly as displayed below:
General:

Compression:

Output:

Security:
Summary:

Step 4: Save Your Settings
After you complete the above settings, Click Save Preset > Name the Preset as: PrintSource360 PDF > Click Save PDF.
The Adobe PDF Preset (PrintSource360 PDF) is now saved and available for future file exports.